|
|
Post by starlord on Apr 10, 2007 20:43:21 GMT -5
Let us know what you think!
|
|
|
|
Post by >>Riz! on Apr 11, 2007 3:50:55 GMT -5
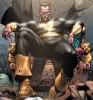
WHOA. I didn't read it yet, but that cover is absolutely AWESOME
|
|
|
|
Post by brigante133 on Apr 11, 2007 4:19:21 GMT -5
why thank you borize.
|
|
|
|
Post by HoM on Apr 11, 2007 6:20:53 GMT -5
Great cover Ramon! Really cool, as always (But of course, when are they not?)
This was a strange one to read. The Doll's House is my favourite arc of Sandman, so it was constantly nagging at me that you were lifting a lot of stuff from that original storyline, especially with the Bogeyman stuff, and the numbers, you know?
But I liked it.
It was very good.
I like Zsasz a lot (having written my own Zsasz arc a while ago in Batman (#11-12)) and this was a really cool vision of him. I love the idea of the Corinthian inspiring all these serial killers in twisted and strange ways. I enjoyed the Joker bit, it was different and quite interesting as opposed to his normal maniacal incarnation. Subdued Joker is still very scary.
So whilst I thought this was a mishmash of certain story aspects, you wove them together into something that read quite well and quite interestingly, even thought I got a Thelma and Louise vibe off the ending (I kid, I kid).
FYI, Cornelius Stirk visited a "Convention" in Las Vegas last year, in The Question Annual #1...
|
|
|
|
Post by David on Apr 11, 2007 6:20:56 GMT -5
It is a pretty cool cover, but--- and I could be wrong here, not being the world's biggest Batman fan--- but isn't Zsasz spelled incorrectly on the cover...?
I don't recognize the writers's name on this, but it looks like an interesting issue--- looking forward to reading this.
|
|
|
|
Post by HoM on Apr 11, 2007 6:48:50 GMT -5
Heh. Dave's got a point, R!
|
|
|
|
Post by Admin on Apr 11, 2007 7:12:05 GMT -5
Well, I'm glad that I've read the Doll's House or I might have been confused. As it was, the bits I enjoyed most of the story were the bits that didn't tie in with scenes from that story. Anyway, I thought the writing itself was great and liked the ending.
I noticed that Zsasz was spelt Zsaz throughtout the story as on the cover, so I'm still trying to work out if you spelt it that way deliberately just to set it apart from regular DC2 continuity (I notice that you used the same spelling of his name as the Batman Begins movie used).
|
|
|
|
Post by HoM on Apr 11, 2007 7:16:29 GMT -5
But Zsasz has been established as Zsasz in the DC2, so continuity wise, it should stick to that, IMO.
|
|
Mischief
Staff  I Sit Upon My Throne As The Guardian & The Keeper Of The Lightning.
Posts: 1,517
|
Post by Mischief on Apr 11, 2007 10:06:42 GMT -5
I read this tale with fresh eyes, having never ever reading his first appearance and all. Never reading about him the regular DC continuity. The beginning of the story was very interesting and funny with the chat with Cort. and Mista Jay. Loved it!!! The cover was impressive. I gave it four out of five stars because I really don't know the character.
Mischief
|
|
|
|
Post by starlord on Apr 11, 2007 11:36:07 GMT -5
Awesome cover Ramon!!!! Makes all that fretting from not hearing from anyone, seem kind of silly now.  |
|
|
|
Post by Mr Clown on Apr 11, 2007 12:37:04 GMT -5
I loved the cover, and honestly I completley missed the spelling mistake in the story. (The sad thing is I checked the spelling in a couple of comics I have with Zsasz in them, and the instruction manual to the Batman Begins ps2 game. I think that's what messed me up spelling it.) The parts simillar to The Doll House were meant to be a tribute to the original story by Neil Gaiman. I did my best to describe those scenes from a different perspective, and avoided any direct imitations of the actual story. Some parts, like Nimrod being the one to organize the convention seemed to make sense since his sole existence was as the organizer of the convention in the original story The Doll's House. I thought about using the original Bogeyman from Swamp Thing, but thought it would work best if some of the "collectors" came in after the climax, and the imposter was the best way to get them out of the building. This was my first story on DC2, and I'm deeply sorry if some of it came off as being lifted from Dolls House. Those scenes were meant to be a homage, nothing more. Certain parts like with the numbers and Bogeyman were part of the character, and I didn't want to change the character by not including something with the numbers. Oh, and the title is freakin awesome! Thanks to Starlord, and Mark, and everyone that's posted feedback on the story. Oh, and Susie for introducing me to this great site. |
|
|
|
Post by brigante133 on Apr 11, 2007 13:08:10 GMT -5
yeah i spelled it zsasz first but then i went into the issue and just copied and pasted the name so...
|
|
|
|
Post by Mr Clown on Apr 11, 2007 14:14:17 GMT -5
Ugh, I meant the cover, not the title sorry about that.
|
|
|
|
Post by starlord on Apr 11, 2007 14:22:00 GMT -5
I just wanted to say that the mis-spelling is my fault. I honestly don't know the character that well and never left this site to check on things.
However, since I didn't know about the spelling error, or any of this Dolls House or anything else you all are talking about, I found Michael's story fascinating! He really had me enthralled to the very end on this story.
I hope to see more of his work here. He's a great catch!
|
|
|
|
Post by Mr Clown on Apr 11, 2007 14:24:05 GMT -5
Just wait till next months Rogues Gallery then.  |
|
Mischief
Staff
I Sit Upon My Throne As The Guardian & The Keeper Of The Lightning.
Posts: 1,517
|
Post by Mischief on Apr 11, 2007 14:33:26 GMT -5
Just wait till next months Rogues Gallery then. What is next months Rogue Gallery then??? |
|
|
|
Post by Mr Clown on Apr 11, 2007 14:35:30 GMT -5
Absolutely Terrible...  |
|
|
|
Post by HoM on Apr 11, 2007 14:51:19 GMT -5
Well I'm intrigued...!
|
|
|
|
Post by arcalian on Apr 11, 2007 15:36:20 GMT -5
I also read the Doll's House. So I was expecing Sandman to show up.....ah well.
It creeped me out, which was the effect it was supposed to achieve.
Agreed on the subdued Joker, and how Joker recognized him...
|
|
|
|
Post by Mr Clown on Apr 11, 2007 16:25:06 GMT -5
I debated on bringing in Sandman. But I thought that if I brought him in, it would have been to much like the original... And I'm glad to know I can creep people out with my writing. |
|
|
|
Post by UltimateDC on Apr 11, 2007 23:48:54 GMT -5
Trippy stuff. I like the "justified killing" angle that Z has (I'll just call him Z. I'm confused on how to spell his name.) I've never read anything with him, but I still think it's interesting.
-UDC
|
|
|
|
Post by Romans Empire on Apr 13, 2007 16:40:29 GMT -5
This issue was good, really good. Everything flowed nicely and the dark overtones were done extremely well without having to be graphic to get the story across. The dialogue was crisp and every creepy character had a unique voice.
Zsasz was an interesting but obvious choice for this story. The Dolls House homage worked very well so I saw no problem with it here.
The various views on killing and killers was very insightful and made the issue for me.
Get debut on the site Mrclown. I can't wait to see what you do next.
Another incredible cover Ramon. Had to look twice at Zsasz's gloves until I realized that it was blood. Very cool!
|
|
Susan Hillwig
Staff
I'm not crazy, my mother had me tested.
Posts: 1,612
|
Post by Susan Hillwig on Apr 15, 2007 14:27:48 GMT -5
Good, but I felt like I was missing something throughout the story. Now seeing all these references to "A Doll's House" here in the lettercol, I know what that something was. It was well-written though, I just wish I knew the story this was sort-of based on. And am I interpreting this wrong, or is the Corinthian supposed to be an aspect of Death? Bonus points for the joke -- I haven't heard that one in a long time, my man. |
|
|
|
Post by arcalian on Apr 15, 2007 15:22:08 GMT -5
More like the avatar of serial killing, I think.
Death, if we're following the Vertigo model (which I assume we are, as I've written a story in which she appears) is a cute goth chickie.
|
|
|
|
Post by Mr Clown on Apr 15, 2007 16:05:57 GMT -5
He's not really an avatar; more of an ideal, he represents the evil inside all of mankind. In the dreaming (A reality composed of peoples dreams, when anyone goes to sleep, they go to the dream realm) he was one of the most powerful nightmares. His role was basically to help people understand the darkness inside of them, and help shape their concious lives. This could be anything from them wanting to prevent the darkness in themselves, or others from hurting people. (Someone like Batman) Or, they could wind up embracing what Corinithian showed them and become a killer. (Um, anyone that was in the story lol) When Morpheus (Sandman) was imprisoned, he left the dreaming in the early 20's and learned how to kill. Since then in Vertigo continuity he never returned to the dreaming until Morpheus was freed, but instead travelled the world and became a serial killer. The way I wrote it though, is that he comes and goes between reality and the dreaming still carrying out his function, in and out of the dreaming.
I probably should have went into more detail about what Corinthian is in the story. But I wanted to have a level of mystery within the character for this issue. I probably should have mentioned the dreaming more though, and with a bit more clarity. (The biggest reference I think was when Joker asked if Corinthian could stop visiting him when he's asleep, and that was pretty vague...)
|
|
|
|
Post by Crow on Apr 17, 2007 19:45:45 GMT -5
Sorry I'm just getting to reading and responding Michael, I've had to work a lot lately. But, I am very glad I read this. Like Mark, I picked up where you got some inspiration from teh Doll's House, but I also see where you made this story your own, and I loved it. Cool stuff.
And it was cool throwing in the Pagliacci story too, that was awesome.
I just have one thought right now: Isn't it interesting that Victor Zsasz and Victor Szazs (better referred to as Vic Sage, the Question) have similar names? Almost identical...
|
|
|
|
Post by Mr Clown on Apr 17, 2007 21:29:37 GMT -5
Yeah, I always wondered about that... I'm thinking it might have been a shout out to one of the writers. I never read any of The Q's Charlton stuff so I don't know if Szazs was his name originally, or if DC made the switch. If they did, it could have been planned for Vic Z, and Vic S to eventually cross paths and find out a relation before Q's series was cancelled. Or if it was that way when he was in Charlton, it was probably a tribute... Or theres some crazy ass multiverse stuff going down.... So many questions, so little answers. |
|
|
|
Post by Crow on Apr 17, 2007 22:35:53 GMT -5
Maybe we can answer our own questions here at DC2...
|
|
|
|
Post by Mr Clown on Apr 17, 2007 23:09:43 GMT -5
True, who's the writer for Question?
|
|
Susan Hillwig
Staff
I'm not crazy, my mother had me tested.
Posts: 1,612
|
Post by Susan Hillwig on Apr 18, 2007 12:19:13 GMT -5
If you have to ask, you ain't been here long enough. ;D Hey, Charlie! Some clown's asking for you!  |
|