|
|
Post by Admin on Mar 26, 2008 19:59:31 GMT -5
Please let us know what you think!
|
|
|
|
Post by starlord on Mar 30, 2008 23:17:46 GMT -5
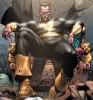
Well, this was a good read. There were a few moments that just didn't really excite me, and honestly, it was most of the Ceasar stuff  . The Black Adam stuff, however, had me glued to the screen the entire time. Very nice work and one heck of a cover! Great job!  |
|
Mischief
Staff  I Sit Upon My Throne As The Guardian & The Keeper Of The Lightning.
Posts: 1,517
|
Post by Mischief on Mar 31, 2008 7:40:55 GMT -5
D'OH
Still trying to find the voice of Caesar within the DC2Universe.
Thanks Brian for the kind words.
I have to thank Riz for the incredible coloring job that he did for this issue. The 'Chief bows before his mastery of colors.
The ending is the moment The 'Chief was most proud of. Join us in Shazam #9 for the conclusion of Goddess Found with a very special guest artist providing the cover.
Mischief
|
|


 .
.